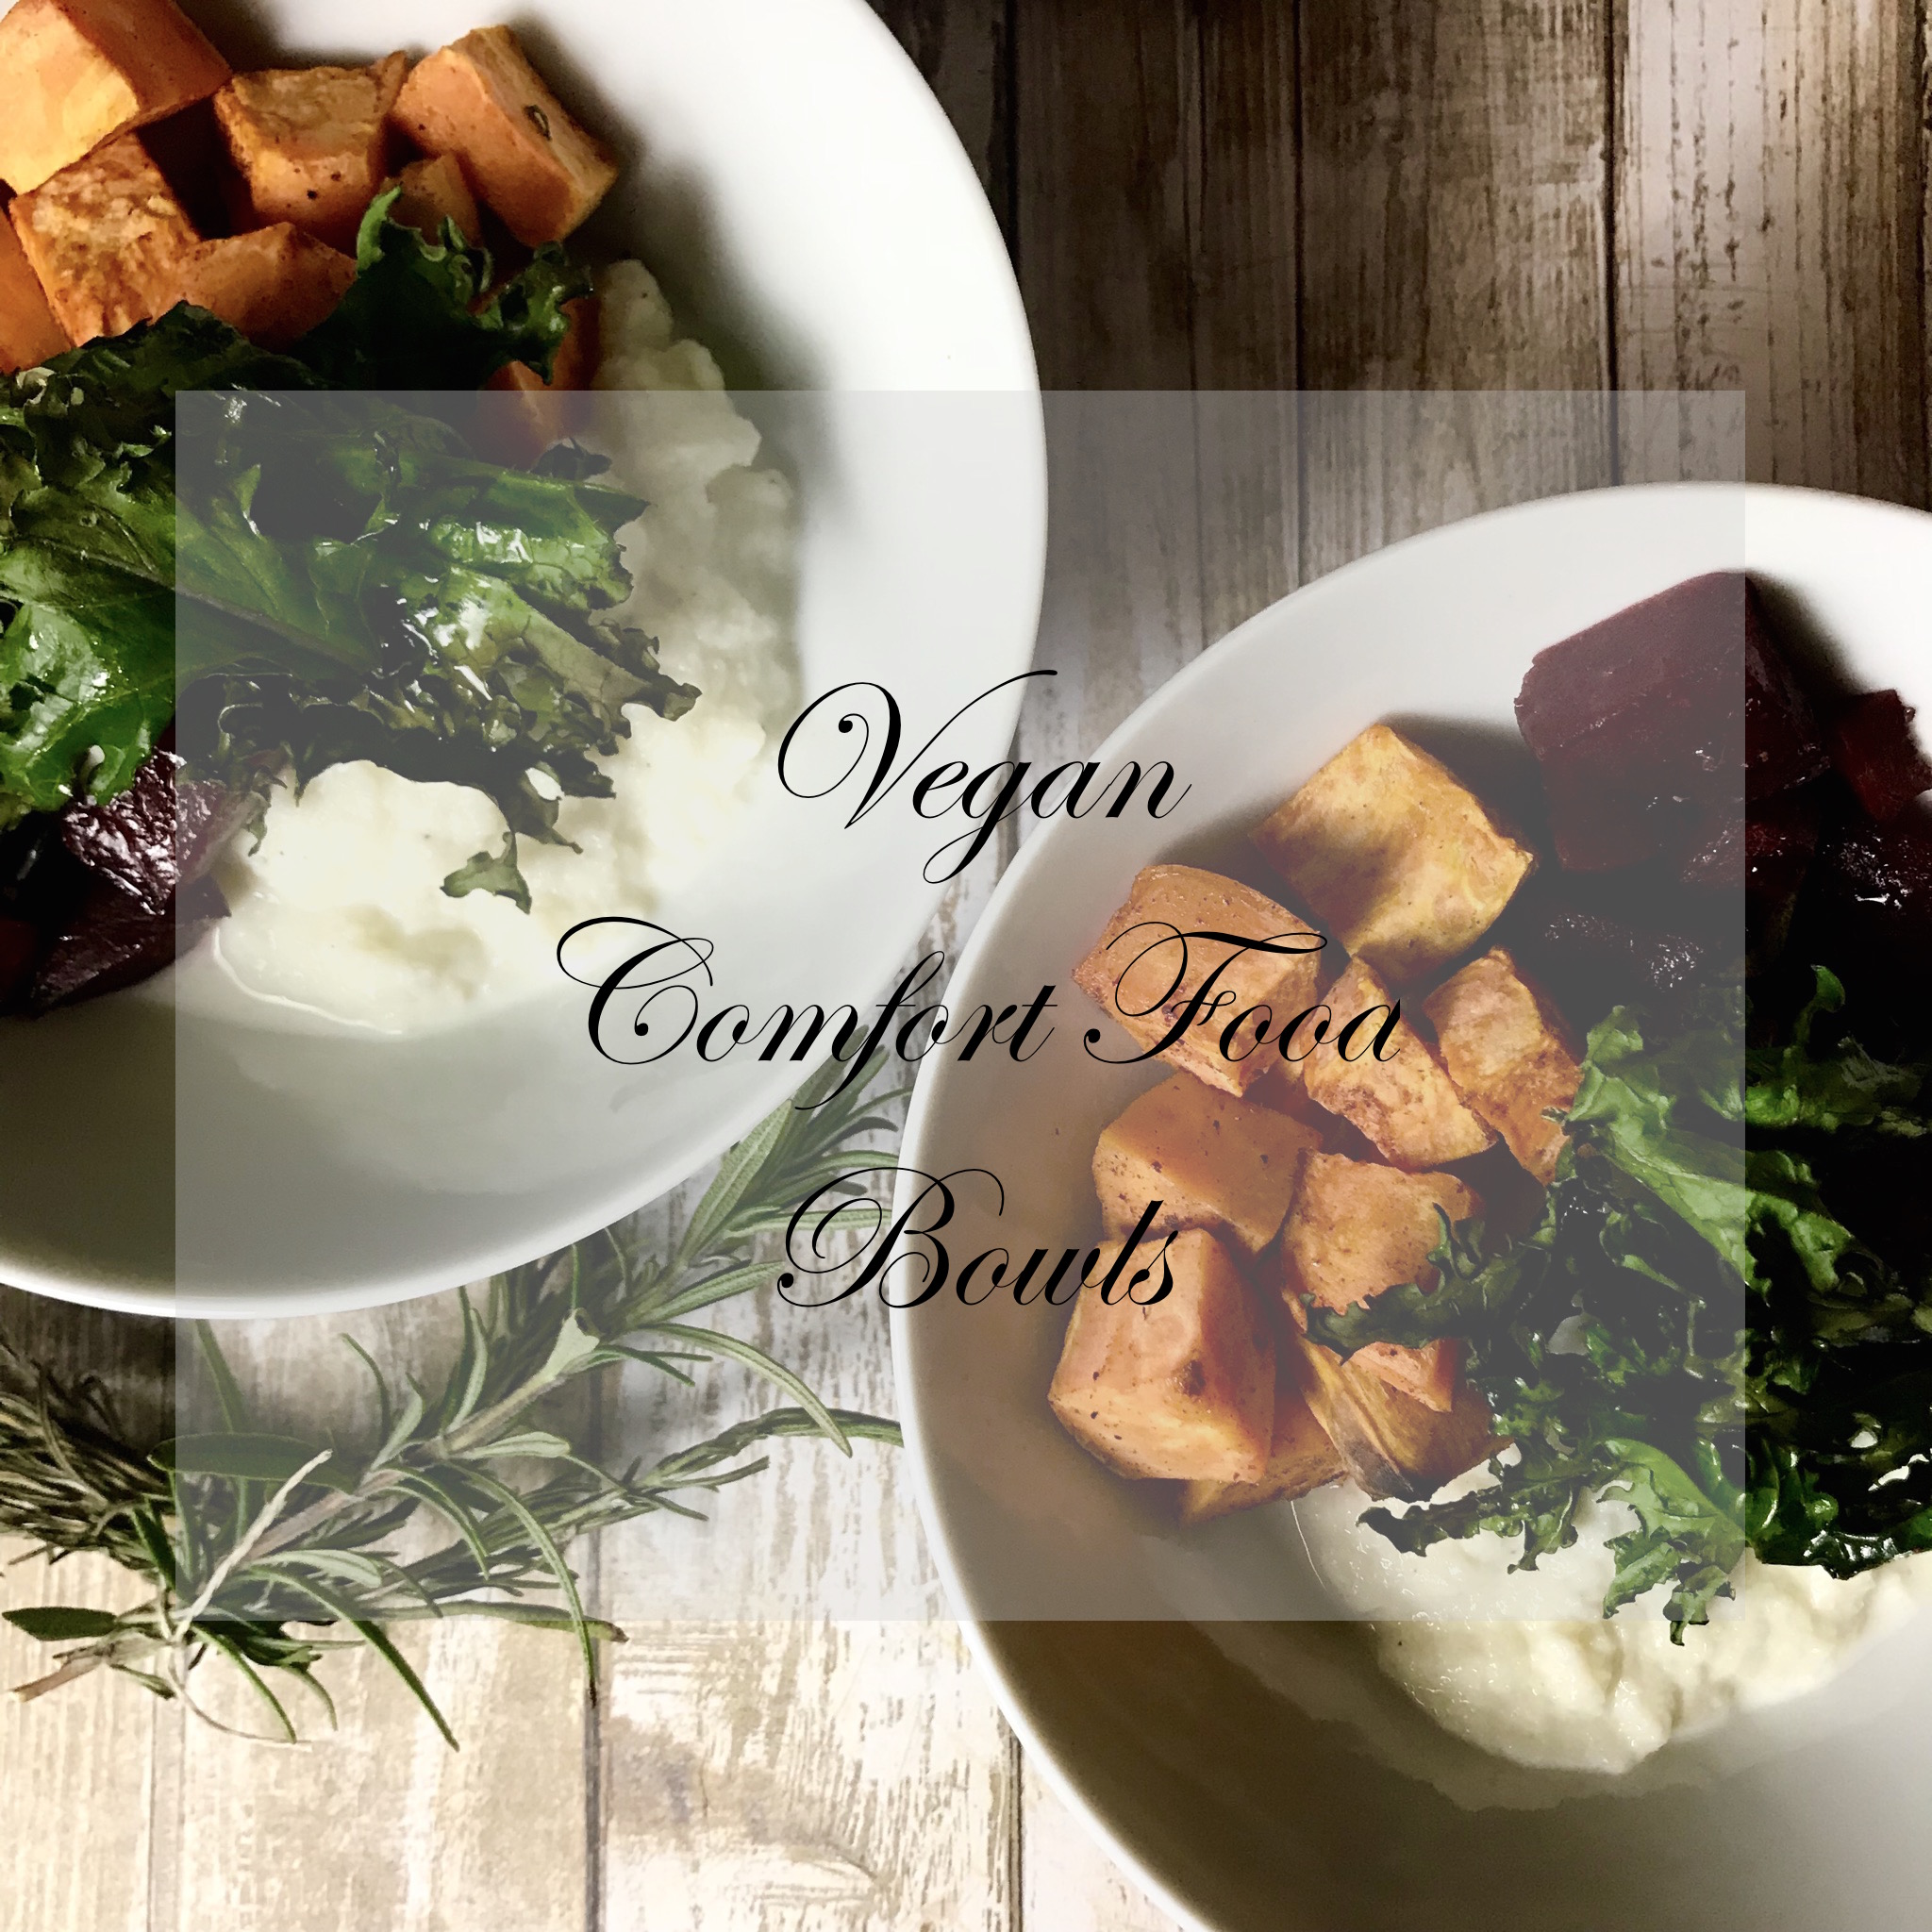
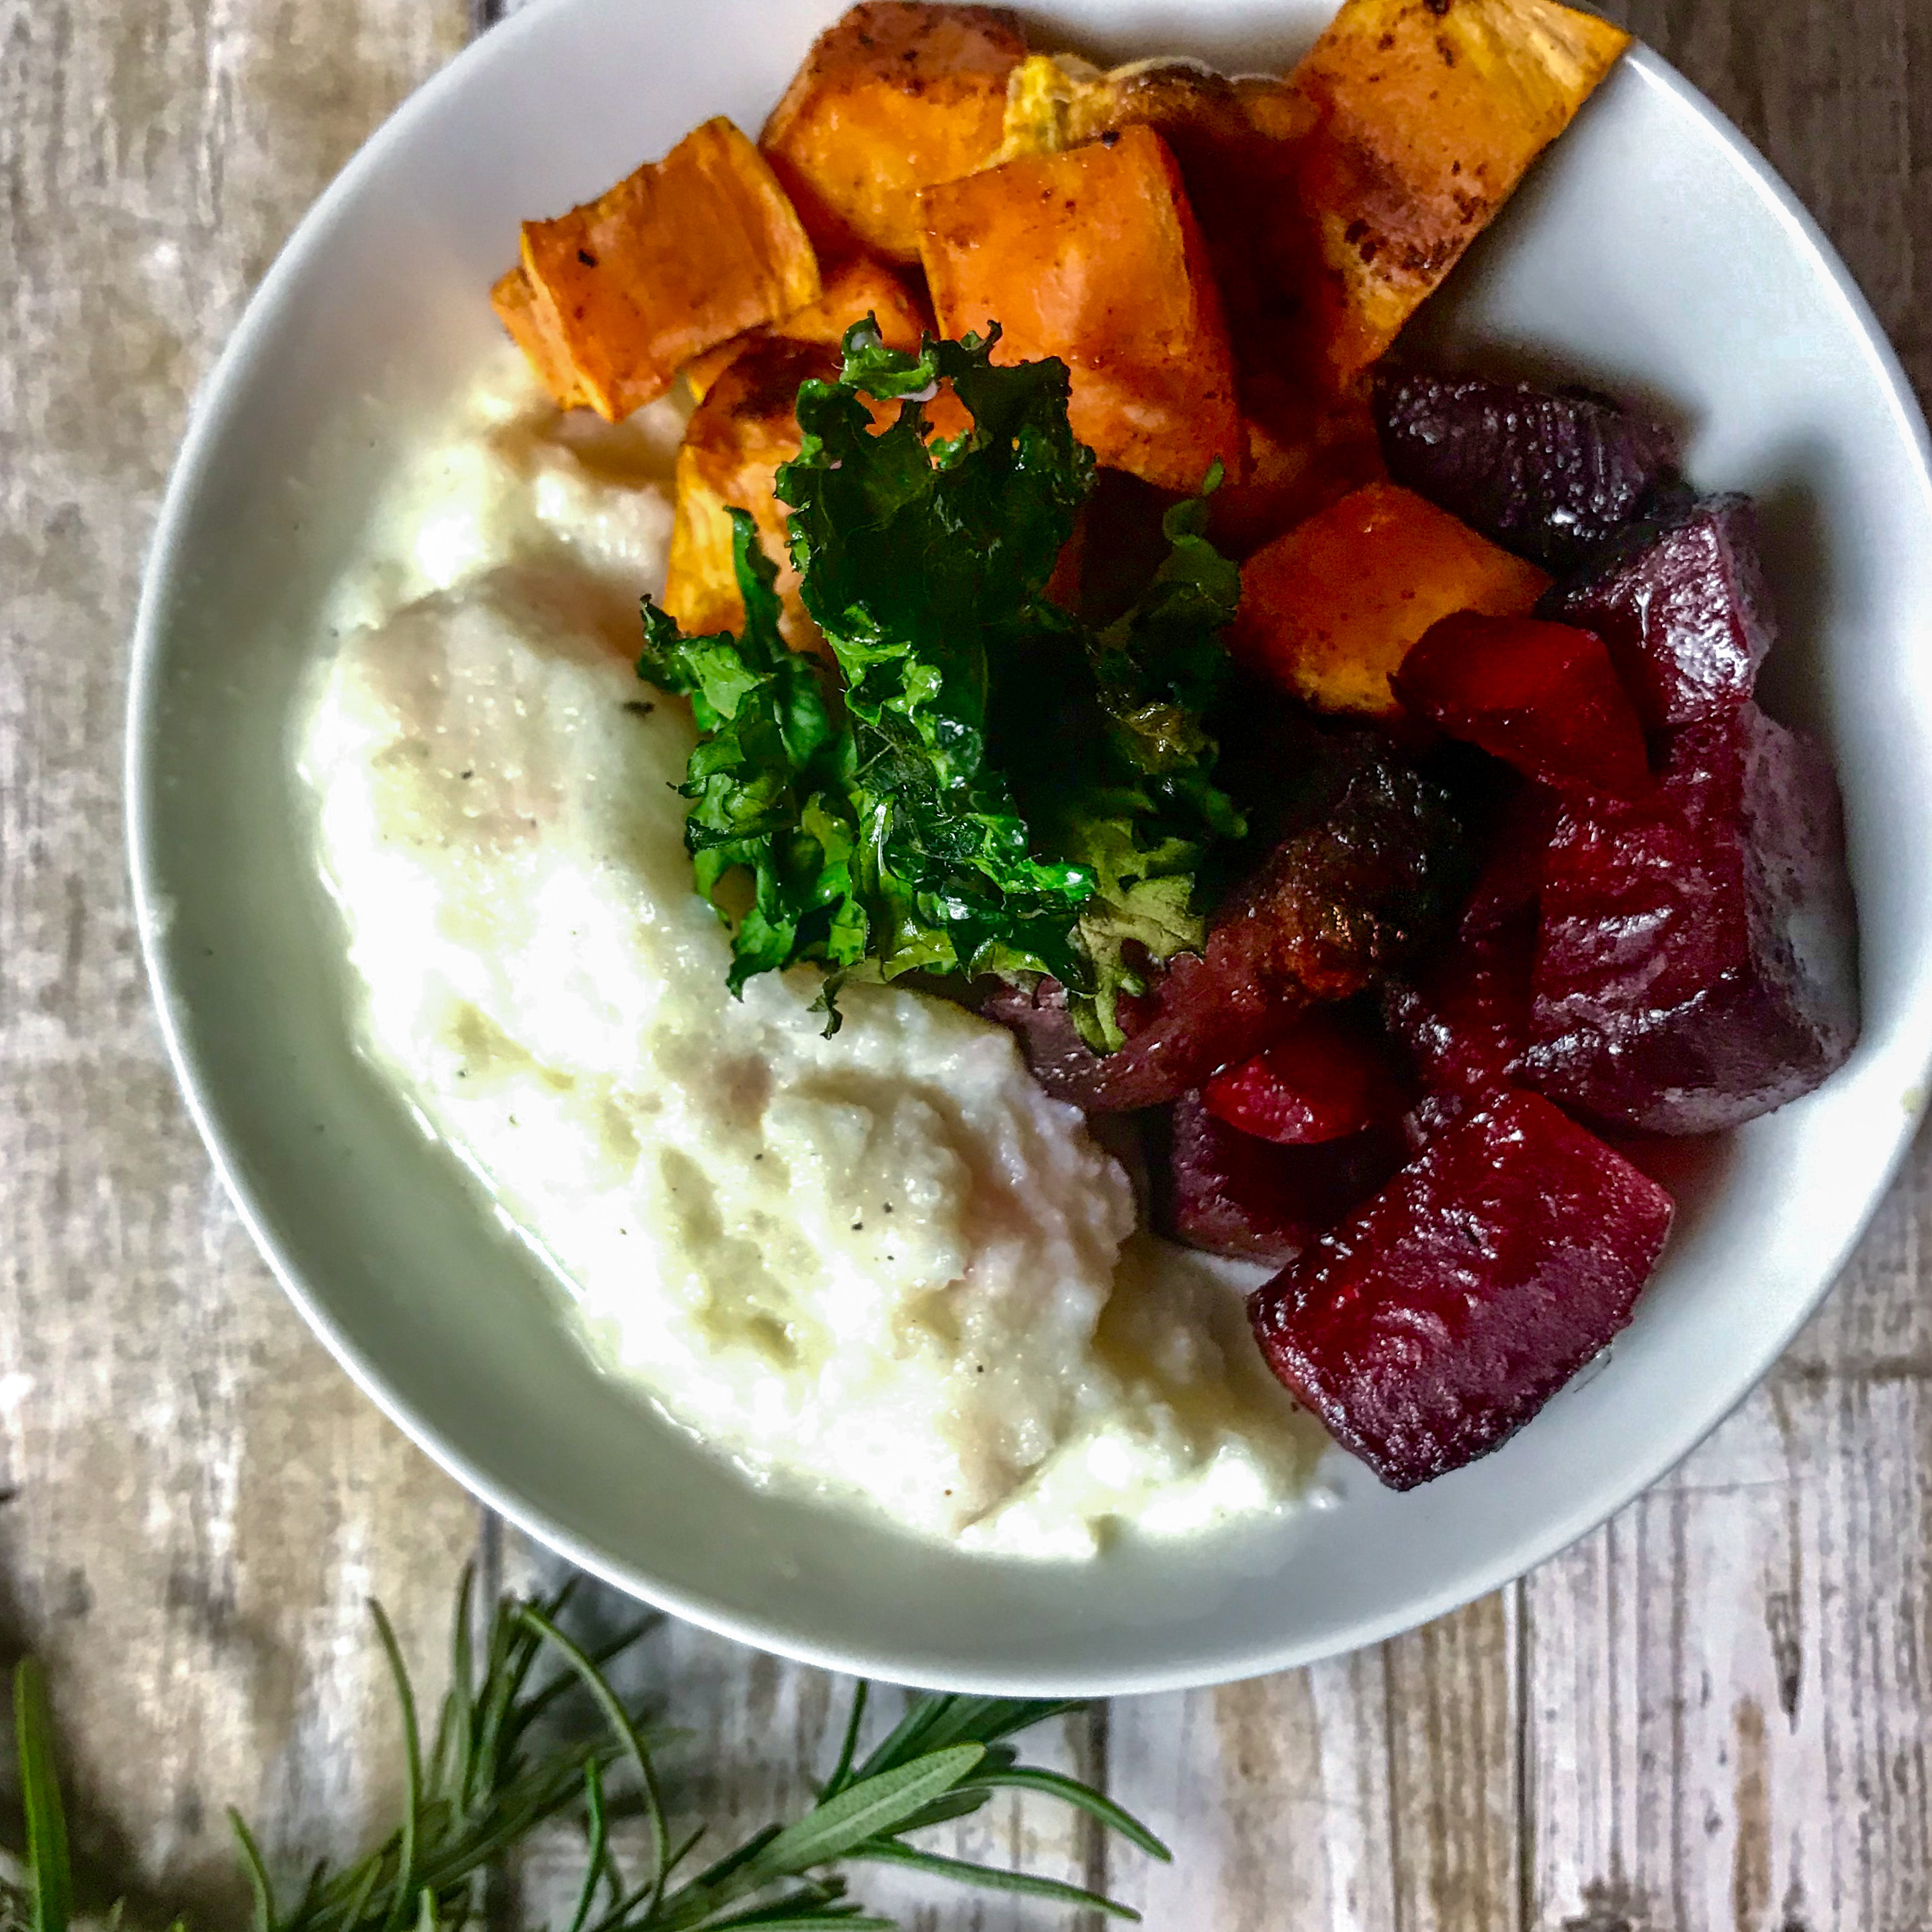
It’s that time of year again. Nights are longer, days are colder, and I’m dreaming of blankets, candles, and comfort food; however, I still want to feel healthy and be mindful about what I’m putting into my body. During the summer months, I love making Buddha Bowls, colorful vegan bowlfuls of fresh veggies, quinoa, and tofu, and I just started making comfort food versions. This one features root veggies and mashed cauliflower, as well as kale and rosemary which are still going strong in our winter garden!

You will need:

  • 3 cups Cauliflower, Chopped
  • 2 cups Fresh Kale
  • 2 cups Beets, Peeled and Diced
  • 2 cups Sweet Potatoes, Peeled and Diced
  • 3 tbsp Fresh Rosemary
  • 1 tsp Cinnamon
  • 1 tsp Cayenne Pepper
  • Olive Oil, Salt, and Pepper (to taste)

Heat oven to 425º. Toss beets with a little olive oil, salt, pepper, and half of the rosemary. Toss sweet potatoes with olive oil, cayenne, cinnamon. Arrange side by side on a baking sheet, leaving some room on one side, and place in the oven for 20 minutes. Remove from oven. Toss kale with olive oil and carefully place on baking sheet next to the root veggies. Place baking sheet in oven for additional 10 minutes.

Bring 5 quarts of water to a boil. Add cauliflower and remaining rosemary to boiling water and boil gently for 10 minutes. Drain. Add cauliflower, garlic, salt, and pepper to a food processor and blend until smooth. Add vegan butter or unsweetened nut milk for a creamier texture!

Arrange mashed cauliflower, sweet potatoes, beets, and kale in a large bowl, top with vegan gravy or cranberry sauce, and enjoy!

What’s your go-to vegan comfort food?

Handmade Herbal Soap Bars

The herb garden is still flourishing, and I’ve been using and saving as much as I can. Today I’m making a bunch of herbal soaps.  They’re great to have around for guests, and perfect for little homemade gifts. I just use a basic soap base and add essential oils, herbs, and moisturizers. Each recipe makes 1 bar.

Thymely Rose

  • 1 cup Soap Base
  • 1 tbsp Coconut Oil
  • 10 drops Rose Essential Oil
  • Dried Thyme and Dried Rose Petals

Carefully melt the soap base using a double boiler and stir in oils. Pour into soap mold. Drop in thyme and rose petals as desired, and let cool completely.

Citrus Spice

  • 1 cup Soap Base
  • 1 tbsp Olive Oil
  • 10 drops Tangerine Essential Oil
  • Fresh Rosemary & Cloves

Melt the soap base using a double boiler and stir in oils. Pour into soap mold. Drop in rosemary and cloves (optional… and scratchy) as desired, and let cool completely.

Lavender Oats

  • 1 cup Soap Base
  • 1 tbsp Coconut Oil
  • 10 drops Lavender Essential Oil
  • Dried Lavender and Oats

Melt the soap base using a double boiler and stir in oils. Pour into soap mold. Drop in lavender and oats as desired, and let cool completely.

Mintea Tree

  • 1 cup Soap Base
  • 1 tbsp Olive Oil
  • 10 drops Tea Tree Essential Oil
  • Fresh Mint Leaves

Melt the soap base using a double boiler and stir in oils. Pour into soap mold. Drop in mint leaves as desired, and let cool completely.

Lemon Verbena

  • 1 cup Soap Base
  • 1 tbsp Olive Oil
  • 10 drops Lemon Essential Oil
  • Fresh Lemon Verbena

Melt the soap base using a double boiler and stir in oils. Pour into soap mold. Drop in lemon verbena as desired, and let cool completely.

Happy Herbing!

Rosemary Peach Jam

Rosemary. Such an amazing smell, and the heat-loving plant does so well in the summer, but the aroma usually takes my mind to colder seasons. Not anymore. I found a way to combine this savory herb with summer’s yummiest gift, peaches. I started making and canning jams last year, and they are always a favorite among my family and friends. Here is a recipe for rosemary peach jam, the best of both worlds:

  • 2 cups Peaches, Diced
  • 2 cups Stevia or Other Dry Sweetener
  • 2 tbsp Fresh Rosemary Sprigs
  • Champagne or Sparkling Wine

Combine the peaches and sugar in a saucepan and bring to a gentle boil over medium heat. Add a splash of the champagne while stirring frequently (I also add a little pectin if it’s not quite the consistency I want). Remove from heat when jam sets (scoop some up with a spoon and allow to cool slightly to test), carefully remove rosemary sprigs (optional) and pour into mason jars when almost cool.

Any healthy baked good recipes out there that you would serve with this jam?

Basil Pesto

Earlier this summer, my basil plants were looking super sad. I even thought they were done for good at one point. I tried altering my watering schedule, but to no avail. Then, one day, out of the blue, they were huge! I still have no idea what changed, but they are thriving now, and every time I clip them they basically grow back overnight. So what do I make with my new abundance of basil? Pesto, (what else?) and lots of it. This week I made my favorite pizza dough recipe, smothered it in this pesto, and added some fresh mozzarella and banana peppers from the garden. It’s so satisfying to create and cook with produce you’ve grown and nurtured yourself, and this pesto recipe is one of my favorites. Get it below:

  • 2 cups Fresh Basil
  • 2 Cloves Garlic
  • 1/3 cup Pine Nuts
  • 1/3 cup Parmesan Cheese (or vegan alternative)
  • 1/3 cup Olive Oil
  • Salt and Pepper to Taste

Combine all ingredients in a food processor, and that’s it! Pesto. 

Part three, coming up!

Fresh Dill Pickles

I made this recipe using fresh dill from my herb garden and pickling cucumbers from the farmer’s market in Old Colorado City, just outside of the Springs. (We have a few cucumber plants in the garden, but they haven’t produced quite yet). I plan to can a bunch of pickles when we harvest our cucumbers later this season, but for now I just popped the jars in the fridge knowing they’ll get eaten up in no time. The recipe is pretty simple:

  • 1 lb Cucumbers, Sliced, Halved, or Quartered
  • 1 cup White Vinegar
  • 1 tbsp Apple Cider Vinegar
  • 1 cup Water
  • 2 tbsp Salt
  • 1 tbsp Sugar
  • 2 tbsp Fresh Dill
  • 1 tbsp Pickling Spices or Dill Seeds

-Bring the water, vinegar, salt, and sugar to a boil, stirring just until the sugar dissolves. Remove from heat.

-Loosely pack sterilized mason jars with cucumbers.

-Drop in fresh dill and spices.

-Fill remaining jar space with warm vinegar mixture.

-Cover with lid and refrigerate for up to a month. (Refrigerate for a few hours before opening for best taste).

More to come from the fresh herb series, and look out for some canning chronicles and recipes coming to the blog this fall!

Garden Compost

The garden is getting huge. In late spring, we planted tomatoes, zucchini, yellow squash, beets, carrots, pumpkins, watermelons, corn, okra, quinoa, beans, berries, onions, and a variety of peppers including purple cayenne, habanero, and jalepeno. The list goes on and on, and we just harvested our first zucchini! Shortly after we planted, I began composting using an old compost spinner from my landlord. (I’ve also created one in the past by drilling holes into a plastic outdoor trashcan). Compost can be a great additive to any garden, but it took some research to learn the best (and worst) things to add to my compost. Below is a guide on what I usually toss in there:

I make sure to NEVER add animal products or waste, oil, or charcoal. Being vegetarian, it’s easy to monitor what goes into my compost by keeping a big, airtight jar on the kitchen counter for food scraps. I just empty it into the spinner when it gets full. I also toss weeds and greenery in the spinner pretty often. It’s been so exciting to watch the garden take off, and I can’t wait to share more with you as the harvest continues!

Ice Infusions

While most of my herbs are loving the heat this summer, I’m using them to hydrate on these hot, dry days. After spending the day out in the sun nurturing the garden and clipping herbs, I’m in the mood for something cold and refreshing. I found a way to combine my cold craving with my garden goodies: infused ice cubes.

Just drop a few herb clippings and fruit of your choice in an ice cube tray filled with water, freeze, and pop a few into a glass of H2O. As the ice melts, the herbs and fruit start to infuse the water with amazing flavor. My favorite combinations are blackberry/rosemary and blueberry/mint. I’ve also been experimenting with herbal infused iced teas. Hydration is important, so be creative with it!

Growing an Herb Garden

After a few unexpected weeks of rain, wind, and even a little snow, the sun finally emerged and began to warm the earth around me. I graciously planted my bare feet in the dirt and, after much anticipation, started transplanting my herbs to the garden. Since I have been limited to small garden boxes or indoor pots in the past, I wanted to take advantage of all of the space in my new yard. I designated specific areas for different herbs based on the plants’ needs. Below is a guide on where to place plant babies and how to care for them.

Rosemary and lavender love the sun. They absolutely love it. Full sun is best for these plants. And they are definitely not needy when it comes to watering. Water is usually only necessary for these babes when the soil gets pretty dry.

I have a few basil plants as well as some varieties of mint. Basil plants can grow pretty large, so leave some room for them to spread out. Basil and mint prefer a lot of sunshine, but can also tolerate some shade. They’re a little more fussy and need to be watered regularly.

Dill enjoys full sun, but also doesn’t like to get too much heat. I’m still trying to find a balance for my dill plants. Dill also needs to be watered pretty regularly.

Sage, thyme, and cilantro prefer full sun and well-drained earth. Sage and cilantro may tolerate some shade. Make sure to provide plenty of room for plants, especially cilantro, to grow and grow.

Chamomile and lemon verbena seem to enjoy more shade than sunshine. They also don’t need a ton of water.

It always helps to do research before starting an herb garden. Some methods of growing and care may differ depending on types of herbs, as well as your zone.

As my herbs grow, I’ll be making all sorts of concoctions, potions, and recipes with them and sharing on the blog! See you soon, and happy planting!